Tricks Of The Trade 01—Steam Boxes
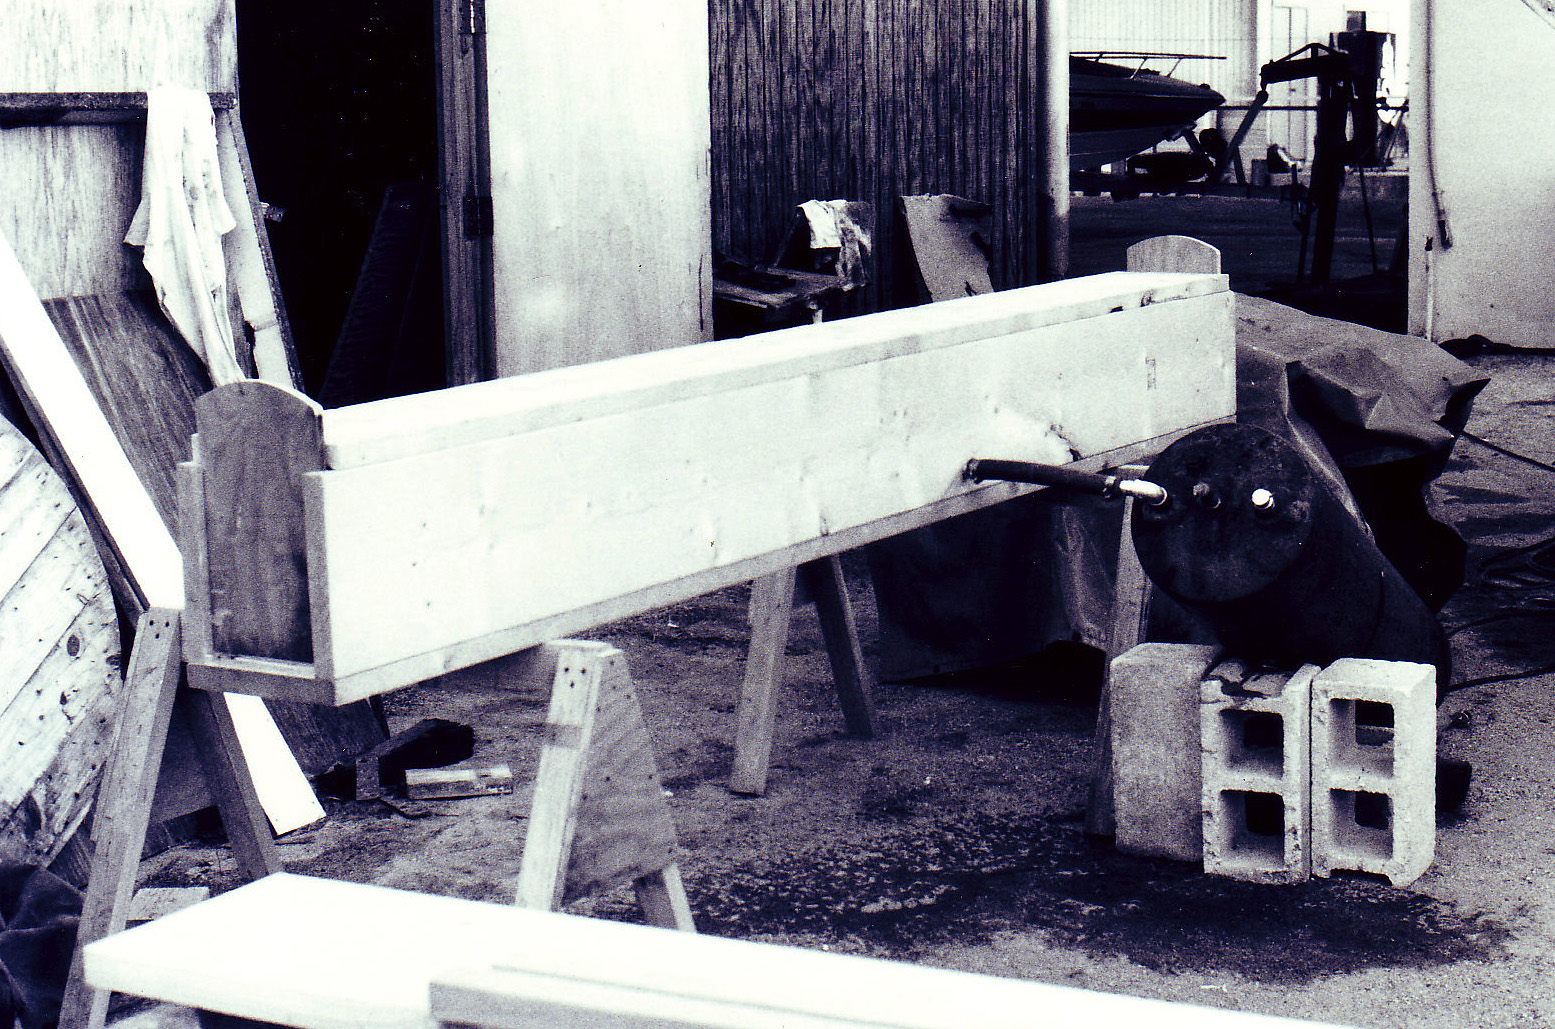
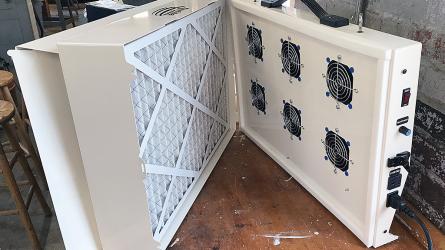
A heavy-duty steam box made from spruce 2x12s powered by a discarded hot water heater.
Steam boxes seem to have drifted into the realm of anachronisms. About once every ten years someone asks me how the devil you make one in a hurry… so here’s how.
I start by cruising around middle-class neighborhoods on trash day. Or you can check the local dump. What I am looking for is a discarded hot water heater, of average size. It seems plumbers tell their clients they need a new one, and the old one ends up by the curb. When I find one I throw it in the back of my truck and bring it to whatever boatyard I happen to be working in (in this instance it was Port Salerno, Florida).
First thing is to strip off the outer sheet metal cover, remove the fiberglass insulation, and toss these items in the dumpster. Next, bypass the thermostat and hot-wire a 240 volt AC power cord directly to the heater element—but don’t turn the electricity on (just yet). I find it interesting that the few times I have done this, I found the only thing wrong with the discarded heater was either a rusty cover, bad thermostat or a burned out heater element. You can use an ohmmeter to test for continuity in the heater element. If it shows infinite resistance or a direct short, the element is burned out. Elements are (mostly) easy to replace, and available from any plumbing outlet, Lowes or Home Depot stores.
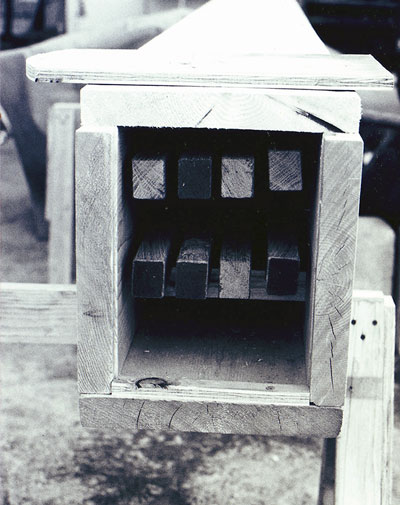
White oak frames in the box ready for steaming.
Hot water heaters are plumbed as follows: cold water in; hot water out; emergency relief valve; drain (optional). Cold water in is usually located low on the tank, while hot water is located high (by convection, hot water rises highest). Use plugs for all but cold water in and hot water out (near the top of the tank).
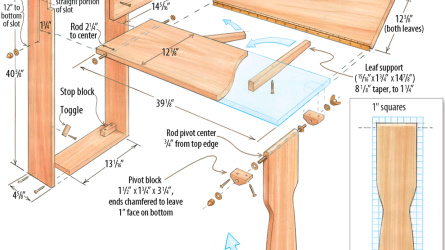
Make the steam box from standard lumber, using plywood for doors at each end. Cut channels in the sides of the box near the ends to allow the doors to lift out. Make supports from 2x2s for your frame stock to rest on several feet apart, depending on the size of the stock (thicker frames need fewer supports). Make the top of the steam box shorter than the sides and bottom for the lift-out doors. Use small cleats to help seal the doors at the bottom—the tighter the box, the better it will work.
Plumb the top of the hot water heater to the bottom-middle of the steam box using metal pipe fittings and rubber hose (PVC fittings will melt). The tank may be used vertically or laid at an angle (as in the first photo). Fill the tank two-thirds full of water and connect power to the heater element(s)—(some hot water heaters have two elements). After perhaps an hour or two, steam will be produced. Because the thermostat was bypassed, the heater element will not shut off until you disconnect the power. Note that if the water level falls below the level of the heater element, it will burn out—hence you may have to add water periodically when steaming large material.
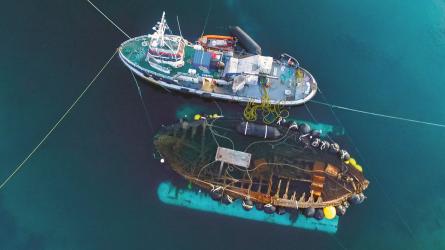
The frames we steamed in the box shown in these photos were for the restoration of the 1926 Alden Malabar Junior IMAGINE, undertaken (the second time) in 1989. Although the sloop was only around 30′ on deck, she was strongly built, and her frames were about 1 ¼″ x 1 ¾″. They required many hours of steaming to take the curves in IMAGINE’s beautiful wineglass hull. The time required was determined by trial and error—the frames had to be very hot, wet and limber before we could fit them into IMAGINE’s hull.
IMAGINE had been wrecked in a fall gale near City Island, New York. A large hole had been smashed through her port side, affecting many frames, planks and decking. To replace frames, I re-planked her using alternate planks, leaving gaps for large C-clamps to hold the hot frames to the correct hull shape. The latter was determined by taking a template from the adjacent starboard side and attaching it to the port side to establish hull shape—you can see the top of the template in the photo below-left.
The real challenge involved getting the bottoms of the new frames to make the radical reverse curve below the turn of the bilge, where the frame was driven beside the keelson. The frames had to be very, very hot and limber, requiring hours of steaming, and we had to work very quickly. A four pound sledge hammer was used to drive the frames (from above) into their final position, as evidenced by the damage to the frame head on Bill’s left. The lower frame ends were trimmed to fit against the keelson before steaming.
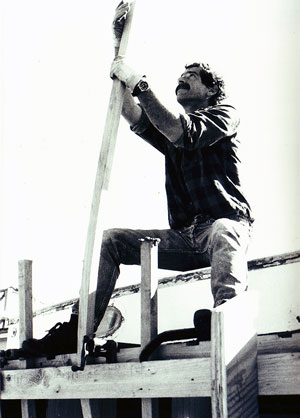
My boatbuilding partner Bill Smith pushing a hot frame into place—gloves are required!
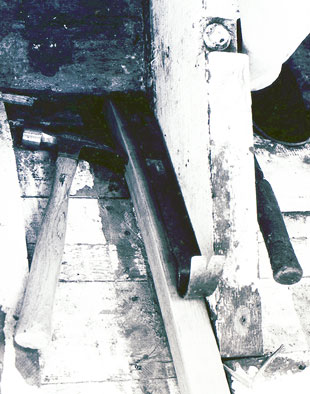
Using a flat pry bar to force a hot frame beside the keelson.
The frame shown in the above-right photo was later fastened to the adjacent white oak floor timber. The square bolt head visible in the top/right of the photo is a keel bolt, attaching the floor timber through the keelson, into the outer keel, and finally through the cast iron ballast.
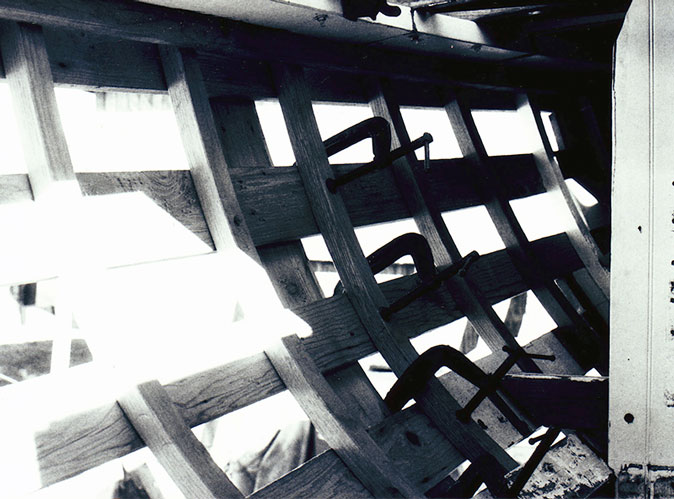
Large C-clamps were used to hold hot frames in place prior to fastening.
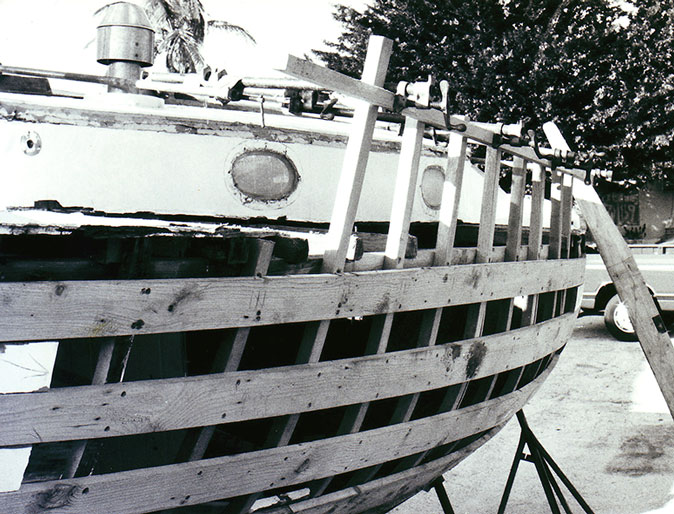
The new frames in place, ready to be trimmed to fit below the covering board.
In the above photo you can see the section of new scarfed-in-place sheer clamp, into which the frames were through-bolted using bronze carriage bolts. The new frames were fastened to the planks, after which the “shutter” planks were spiled and laid between them. Then the entire hull was faired and double-diagonal planked using epoxy glue. After a final fairing, the hull was covered with Xynole-polyester fabric saturated with epoxy, with two fabric layers below the boot top.
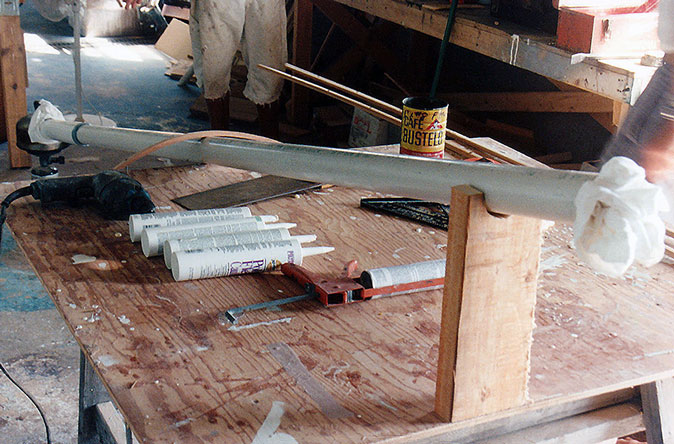
A “quick and dirty” steam box made from PVC pipe, a kettle and Coleman stove.
For steam-bending small trim, I devised the Q & D steam box shown in the above photo. We were building the prototype Commuter 36 MAGIC, which required curved trim pieces inside and outside the elliptical cabin front.
These are examples of two very different steam boxes devised from commonly available materials. Both did their job perfectly.
5/9/2014, Saint Lucie Village
Author’s Note: You can see the entire second restoration of IMAGINE, as well as the entire construction procedure of MAGIC on the Construction Page of my website, www.parker-marine.com